10/26/10

Repurposed Soap Dispenser


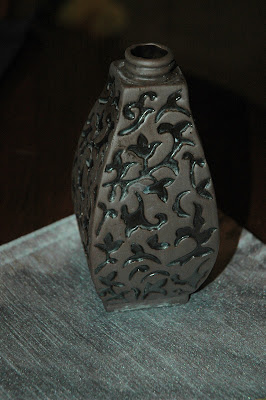
My soap dispenser stopped dispensing soap! I was very sad, because I loved the look of it. So I held onto it trying to figure out what I could use it for. I am not sure why it took me so long to see that it is a perfect flower vase, but it did. So here it is! Soap dispenser turned Vase.
~Elisa~

10/23/10

A little Rocker.

We are borrowing this rocking chair from my parents house. My mother has quite a few little chairs, and she let me borrow this one that was mine and my siblings when we were younger. I didnt' want to paint it very bad, because I like the "old" look it had. So instead I made some pads for it that matched the little table cloth I made for the puzzle table.
 Here is the before of the chair
 Now draw your desired shape size on the back of your fabric,
 Make as many cords as you want for tying the pad to the chair,
 Pin the cords into place. You want them facing in as you sew around the edges so when you flip it around they are facing out.
 Then lay the othe side of the cushion over the pinned cords, and serge around the edges, leacing the bottom open.
 Flip in around and you have your casing.
 Now fill to the desired fullness with fiberfill.
 This is what it should look like.
 Then sew lines to make it look quilted. You can do any pattern you want, I went both ways, so there is just little squares.
 Continue all steps for the bottom cushion.
 And here is the finished product. My two year old who thinks this chair is hers, loves it. She always sits on it and says "Nice!" So I guess that means she approves!
Here is the finished table and chair together.I think it looks nice and finished with the red kitchen. What do you think?
~Elisa~
A FREE table - Perfect for the kids

So my dad came across this little table left in a field or something, and thought of me! What a nice Dad, I know! I knew I could do something to disguise the top, but wasn't sure how painting it would turn out. Until I become more adventurous with the little table I came up with an alternate plan. I added some foam board to make it have some storage, and quickly serged a little table cloth with some fabric I've had in my closet for quite some time. It took all of 10 minutes at the most. The foam board was from the dollarstore I had leftover from a project. I just measured the size I needed, cut it to scale, and then cut the corners off so it would fit around the legs of the table. It is a great shelf for puzzles and coloring books.


~Elisa~

10/21/10

A little Door Decor


I needed something on the girls door... Just Because. So I started looking through my craft room for some ideas. I had no idea what I wanted to make, but had to see what I had to make something out of. I came across some ribbon (large 6 inch wide) that I had got on clearance along time ago to make tutu's out of. But it was too stiff for tutu's. It is an ivory color (almost yellow, but looks ivory in person). Then I came across this circle that I had kept from a diaper genie refill (generic brand from walmart I didn't like, and didn't use, because it was separate bags wrapped around this ring that made it not work correctly). Anyways, I figured I could use the new clean circle for something eventually. So I added the ribbon to the circle the same way you would add tulle to an elastic for a tutu (I'll have to pot a tutorial so you can see the method, very simple). Then it needed something more. I thought A bird would be cute since the girls room had birds on the walls now. The only problem was that I didn't have one. So I cut out a bird shape from some scrap fabric (right sides together), sewed it together, leaving a small opening on the bottom, turned it inside out (which was right sides out now), put a little fiber fill inside, and sewe up the bottom. Then I added a wing with some leftover tulle, hand stitcher d alittle eye, and added a little beak. (sorry my camera was dead at the moment, so I wasn't able to take pictures of the process. I really need to keep my backup battery charged!). Then i added a little bit of flowers, glued them both on, and I am pretty happy with their new door decor. I bought the command hooks to hang it on the door.
~Elisa~

10/19/10

Sorry


 Look at that carrot next to the parsnip. It's HUGE!!
Sorry for the lack of posts lately. I have ben super busy with "other" things besides painting, but have tons to do on my "project to do" list. So stay tuned! I'm not gone, I promise. Here is just a look at some of our extra's from the garden. We (my 3 yr. old daughter) and I  pulled out the garden for 3.5 hrs the other day, and found all these yummy veggies! Anyone have a good recipe for green tomatoes, and the only requisite is that they can be little tomatoes used. I have TONS of  pear tomates that are green, and I am trying to think what I could possibly make with them so I don't have to throw them out. So if you know of anything, PLEASE pass it along.
~Elisa~

10/15/10

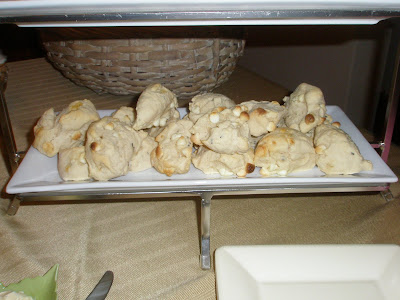
White Chocolate Lavender Scones

These are DELICIOUS! They may sound  a little weird, but once you try one, you won't be able to stop! You'll have to have at least one more. This recipe is from a friend of a friend. I would link this to her blog, but it's private, so just know, this wasn't my recipe, but I use it often now!

White Chocolate Lavender Scones
Ingredients:
3 1/2 c flour
2 T baking powder
1/2 c sugar
1/2 c unsalted butter
2 T food grade lavender
1 to 2 oz white chocolate, chopped into small pieces (or use chips)
2 t vanilla
1 to 1 1/4 c half and half or table cream

Preparation:
Preheat oven to 400F.
Combine the flour, sugar, and baking powder. Add butter by grating it directly into the flour mixture. Add the lavender & white chocolate; stir to incorporate. Add cream and vanilla. Start with 1 cup cream and 2 teaspoons of vanilla. Incorporate into flour mixture. Add more cream if needed or until you have dough that holds together. Do not over work the dough. Roll out dough to about 3/4 to 1- inch thickness. Using a knife cut dough into equal triangles. You can also use cookie cutters if desired. Place on baking sheet or stone and allow to stand for 20 minutes.
Sprinkle the tops with sugar. Bake for 12 minutes or until slightly golden on the top.
~Elisa~
10/12/10

Apple Juice

 We received an abundance of apples, and with one of the bushels, we made 12 quarts of fresh apple juice. Boy was it YUMMY! I think we are planning on making at least one more batch, if not two.
 We cut the apples in half, then realized they where small enough to keep whole, but that's ok. Now we know for next time.  Then we borrowed my father in laws jack la lane power juicer, and juiced them all. It was FAST!
 After that, the Ball Book of canning tells you to heat the juice to 190 degrees.
 As it was heating up, we skimmed all the "stuff" off the top, leaving just the juice. Once it reached the 190 degrees, we ladeled it into our hot jars, secured the lids, and put them in our boiling water canner for 10 minutes. That's all, and they were done! The process was actually pretty fast. I think the longest part was cutting up all the apples that didn't need cutting.
 We tried it Hot
 And Cold, and it was delicious both ways!
~Elisa~

10/11/10

Deal of the Week

I was sooooo excited about this weeks find at the Goodwill. Especially because I wasn't even looking for it! So here are the details, the tag was marked at $4.99. STEAL! But then the whole store had a sale that was 30% off all donated items. So that made the grand total $3.50! When I was researching how much these are, I kept seeing $180. So i am pretty sure that is what the pack retails for. Yep, I saved a BUNCH of money, and can't wait to try it out!


~Elisa~

10/9/10

DIY Drapes

This was a pretty easy project if you can sew just a little. I am no prefessional, and still haven't done any thing other than simple on my machine. So to start, you buy any home decor fabric. I bought mine from one of the long rolls(I can't think of the technical name) But it was on sale at Hancock Fabrics for $3/yd. So I bought 5 yrds, and used 2 1/2 yrds per drape. Cut your fabric to your desired width and length (depends on your window size) Then get an old sheet and cut to fit same lenth and width of fabric. This will be used as a lining and helps it to me more of a darkening shade.
Next, pin the sides and bottom, and sew together. Then decide how much room you will need on the top for your rod and leave alloted amount of room, then pin and sew accordingly. (So, the picture above was from the sides and bottom. The top would have looked the same, except instead of the fabric folder over an inche, I folded it over 2 1/2 inches)

Then hang and enjoy! Total cost for this project $15. I think that's pretty good for custom drapes, knowing that something similar would cost around $30-$50 per panel. 

~Elisa~

10/8/10

Free Beadboard!

I entered a giveaway to win some free beadboard! I hope I win! If you would like to enter for HERE. It's a great deal!
~Elisa~

I found some!

Remember my bathroom shelf redo? Well, I needed something small to fill the space where the nasty drawers had been. They were little spaces, and I wasn't sure what to use. Then a few days later, I was getting something deep in the cupboards of my kitchen, and came across some antique pieces from my grandmother, and my husbands grandmother. I though, "these look like the perfect size!" So I brought them upstairs, and tried them out, and loved them! And they match the bathroom perfectly. I will have to post some before and after shots once I finish the bathroom. It has been getting done in stages for quite some time now! Anyways, here is what I used.

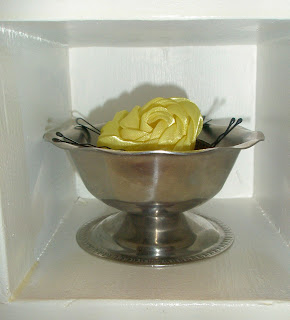
 These little silver dishes (I have 2 of them) are old dessert dishes. They hold bobby pins/ rubber bands, and flossers perfectly! These were given to us by my husbands grandmother.
And these Gorgesous turquoise juice cups are from my Grandmother. She gave them to me in a set of 5 with a cute little pitcher. They are the exact color of the bathroom, and fit in wonderfully. And as you can see they are the perfect height for q-tips. I have some cotton balls in the other one.
~Elisa~

10/7/10

Qunitessential Quinoa

Since it's fall, I find myself cooking on a more regular basis again. This is a wonderful recipe to try if you want to start cooking with Quinoa. This was actually the first recipe I tried, and is one of my favorites. It has lots of favor, and is very healthy.

2 TBS olive oil
4 medium yellow onions, chopped
3 garlic cloves, minced
1/2 tsp sea salt
1 large red pepper, chopped
2 c. rinsed quinoa
4 c. water
2 vegetarian stock cubes or low-sodium chicken flavored cubes

Add finely chopped onion, minced garlic and sea salt to olive oil on wok and saute until onions are slightly brown. It is alot faster to use a food processer or viatamix if you have one. Otherwise the chopping is a little time consuming and with all those onions, you tend to have wet eyes!
 Add chopped red pepper and continue to saute until onions are caramelized.
 If you aren't familiar with quinoa, this is what it looks like after it's been rinsed.
 Add water, stock cubes and rinsed quinoa. Bring mixture to a simmer. Stir once after 5 minutes, then simmer for another 35 minutes or until water has been cooked in. Fluff quinoa mixture lightly with a fork.
 This makes a great addition to any meal, or is good to eat just as a meal, kind of like fried rice!
~Elisa~

10/5/10

Bathroom shelf

 These are some of the before pictures. These little drawers reaked of oil. I assume the shelf was used in a garage, and for some reason, the drawers where soaked in oil. I originally wanted to keep the, and reuse them, but decided after I cleaned them with TSP, that I just needed to toss them. Besides, the cubbies would be the perfect size for little accessories.
We found the shelf at a thrift store for $6. My husband looked at me like I was crazy for wanting it, but I HAD to have it, I knew it would fit perfectly above the toilet, and I had been itching to get things off the counters in the bathroom. With 3 of us girls sharing the bathroom, and not having a real linen closet, I use half of the space under the sink for towels. So there just isn't much storage. When I saw the shelf, I knew there'd be plenty of room for my taller bottles of hairspray, etc. on the bottom shelf. And when do you ever find a shelf tall enough for hairspray?

I then did the same method of painting used to paint  my laundry room cabinets. Next on the list is to paint the bathroom cabinets white to match! And possibly some board and batten. I LOVE the look, but still have to get my husband on board. (Not really, since it isn't even his bathroom!)  And as soon as i find the right size containers for my little cubbies I will post a picture of that to.
~Elisa~


Orange Cookies


These delicious cookies are a lovely combination of citrus, oatmeal, and coconut. You have to try them at least once! I found this recipe in one of my cooking club magazines. Here is the recipe for your convenience. If you end up making them, I'd love for you to leave me a comment on what you think!

1c. Sugar
1c. Brown sugar (packed)
1c. Butter flavored shortening
2    Eggs
2 TBS Orange Juice (I used freshly squeezed)
1 TBS Vanilla Extract
1 tsp grated orange peel
2c. all purpose flour
2 tsp Baking soda
1 tsp Salt
1/2 tsp Baking powder
2c. quick cooking oats
1c. sweetened shredded coconut
Frosting:
2 TBS butter, melted
3-4 TBS Orange Juice (again, I used fresh squeezed)
1 TBS grated orange peel
2c. Powdered Sugar

1. Heat oven ro 350 F. Beat sugar, brown sugar, and shortening in  large bowl at medium speed 3 minutes or until light and fluffy. Add eggs one at a time, beating well after each addition. Beat in 2 TBS water, 2 TBS orage juice, vanilla, and 1 tso orange peel until blended.
2. Whisk flour, baking soda, salt, and baking powder in medium bowl. Beat into sugar mixture at low speed just until combined. Stir in oats and coconut.
3. Drop 1 TBS dough per cookie 3 inches apart onto parchment pater lined baking sheets. Bake 10 min or until golden brown and set.
4. Meanwhile, combine butter, 3 TBS orange juice and 1 TBS orange peel in a large bowl. Whisk in powdered sugar until of spreadable consistency, adding additional juice if needed. Spead each cookie with generous 1 tsp. frosting. Cool completely on wire rack.

4 dozen cookies


~Elisa~